Now that you’re an ace with developing for Bluetooth Low Energy (BLE) devices on iOS using the Core Bluetooth framework, let’s turn our attention to iBeacons. In this bonus installment of the Zero to BLE on iOS primer, we’ll learn how they work and develop an iOS Swift app that uses an iBeacon to track luggage.
Working with iBeacons is not that bad. It might feel a little unfamiliar because you’re working with a physical device outside the confines of your iOS Device. But it’s actually pretty straightforward with basically six steps:
- Create a CLLocationManager.
- Authorize Core Location (only once).
- Create a CLBeaconRegion.
- Start Ranging (or Monitoring, if you prefer).
- Catch any beacons that are detected and use them as needed.
- Stop ranging the Beacon Region (optional).
So let’s dive in and get your feet wet!
##Surprise!
OK… Because you all were so patient in waiting for Part Three of the Zero to BLE series, I thought it would be a nice gesture to follow up the series with a bonus post about iBeacons!
First a quick aside for anyone new to the Zero to BLE series. Take a moment to get caught up: Part One, Part Two – Objective-C or Swift version, and Part Three.
iBeacons are also Bluetooth Low Energy (BLE) devices, and they’re a lot of fun to work with. The great thing about iBeacons is that there’s an even lower barrier for entry in getting started using them, and once you have one or two, you can start doing some pretty interesting things with them.
##(Re)Introducing iBeacons Interestingly, in 2014, it appeared that iBeacons were really going to take off as a technology. There were countless tech news reports on they would change the face of location-based experiences. Then, somewhere along the way all that hype died out and there seem to be a dry period in which you heard almost nothing about these little wonder-devices.
Then, about the middle of 2015, came the Internet of Things (IoT). All the news was now about Arduino, Raspberry Pi, and making. Riding alongside these technologies were the Bluetooth Low Energy prototyping devices like the Light Blue Bean and the Particle Photon. Not only was everyone talking about these prototyping devices and Bluetooth Low Energy, but we also began to see a resurgence of interest in iBeacons.
Because of this interest and regaining popularity of iBeacons, and also after having completed a series of articles on developing for BLE using Core Bluetooth, it seems like now would be a good time to show how you can work with these devices on iOS. Not much has changed since their inception in 2014 with iOS 7 (and their subsequent improvements in iOS 7.1), which is a good thing. It means that the technologies and frameworks that we use to work with them are basically the same as they were two years ago. It also means that it has stabilized somewhat, and there aren’t really any surprises that come up. iOS 10 is here and as far as I can tell, there are no major changes to the iBeacon landscape in iOS.
##Devices Before we begin specifically addressing the iOS side of things, let’s talk about iBeacons as devices. As we mentioned, they are BLE devices and there are quite a few different companies that manufacture and sell them. There are also a few beacon standards, and if you’re working with iOS you can only use the iBeacon standard, not Eddystone or other standards. Don’t expect that to change either, because Apple developed the iBeacon standard, and they appear to be sticking to it.
The good news is that many manufacturers are building their devices so that they effectively are dual-format – supporting iBeacon and Eddystone.
##Selecting an iBeacon When it comes to choosing which device to go with, I personally have no real preference for any one vendor, and Cloud City Development does not endorse any particular vendor either. The best thing to do is do some research, examine your budget, and see which one works the best for you given your needs and monetary constraints.
That said, I’ve found the Estimote beacons to be super easy and fun to work with. I consider them to be the “iPhone of iBeacons” because of their ease of use and setup and their clever physical design. They have a very interesting shape that looks like a little grippy silicone multicolored futuristic rocks. Pricewise, they are now pretty good for what you get–the Estimote Development Kit with 3 Proximity Beacons is only $59 at the time of this writing. On the downside, you can’t replace the battery on them very easily (at least not on the model I have, which admittedly is an older variant). I had to use an X-Acto knife to get at the battery, but once you’ve got one open, you can see that it would be a little easier on subsequent ones &endash; but you do end up compromising the case. Estimote also has a new product called Stickers, which are very low-profile adhesive beacons.
Gimbal’s beacons, however, are super affordable at $5 a pop. Unfortunately, they don’t arrive configured as iBeacons by default. They’re set up with a proprietary format first, and then \you have to convert each one into an iBeacon using their developer website in conjunction with their iOS app. Also, as another potential negative, they have a smaller battery than the Estimote, which results in a shorter life span. The Gimbals also eat up battery life much more quickly when they are configured as iBeacons, so as a result, their battery life is pretty short. The good news is that their batteries are super easy to replace. They’re also very small devices too, even with the case–which is great if you want to attach them to or put them inside other objects. So I think the Gimbals are a great way to get started and you could purchase eleven for the price of three Estimotes.
I’ve only mentioned two manufacturers here because those are the ones I’ve had experience using, and you can’t go wrong with either one. There are many other manufacturers, so feel free to shop around for the best one that suits your needs. The main thing is that you need to make sure that the device you select supports Apple’s iBeacon standard.
As a side note, you can also enable iBeacon functionality in your iOS devices as well. While we won’t be covering that in this article, to see how it’s done, check out Apple’s sample Xcode project for iOS which demonstrates this functionality.
##Uses for Beacons There are a few typical uses for beacons that you hear about most frequently. There’s the typical retail scenario in which regions in a store or individual products have a beacon associated with them. Then an accompanying app serves up advertisements or deals based on the proximity of the app user’s phone to the device.
Another interesting use for them is in the space of art installations and museums. I highly encourage anyone who is interested in this field to check out the Brooklyn Museum’s Tech Blog on the subject of iBeacons. They outline some of the challenges they ran into with managing a mass-deployment of Estimotes, and how they solved the various issues they faced.
In addition to those typical uses, I’m sure you can come up with many more interesting uses for these devices. For instance, Cloud City Development worked with Pop Up Labs to create an iBeacon-enabled Medical Maker Kit, which enables medical staff to about the make or movement, and to even construct their own projects based on parts in the kit identified by the iBeacons. Not only was this an innovative way of using these devices, the fact that it could eventually save someone’s life as a result made it even more rewarding.
##How iBeacons Work iBeacons are Bluetooth Low Energy devices, but their purpose is fairly straightforward. In a nutshell, all they do is broadcast a set of numbers and a single strength measurement that lets your app determine how far away the device is. That’s about it. They have no notion of direction in relation to your app (though it can be derived if you have multiple devices in that in the vicinity).
###Return of the UUID
As we learned in the other three parts of the Zero-to-BLE series, Bluetooth Low Energy devices like to use UUIDs for identification, and iBeacons are no exception. When you purchase and configure an iBeacon, it will be identified by three pieces of data: the UUID, and then two other numbers which are just 16-bit unsigned integers that you can use for identification or categorization purposes to group related devices that have the same proximity UUID. Those two integers are referred to as the major and minor values.
Here’s what’s interesting about the way this works: all of your devices can share the same UUID, and then you can use the major and minor values for the breaking up of the devices into smaller groups and then into individual devices.
For example, you could set up a collection of iBeacons all with a UUID of 2153538C-1312-43CC-8776-2F9684B46529 that map to your business or store location, define sub-groups of devices with a major value of 1 (perhaps items in a specific department in a store, like “TVs”), and then number individual products with their own minor values (1, 2, 3…), and you can customize those numbers to whatever values make sense for your situation or categorization model.
##Working with iBeacons in iOS In the preceding three parts of the Zero-to-BLE series, we learned that when creating apps to interact with physical devices that use Bluetooth Low Energy, we use the Core Bluetooth framework.
However, it’s interesting to note that when working with iBeacons, we don’t use Core Bluetooth. Instead, we use Core Location. This may seem strange at first glance, but once you think about the purpose of iBeacons, then it becomes a little bit more clear as to why we would use Core Bluetooth. Remember, iBeacons are meant to be proximity-based devices and their purpose in life is to send a couple of numbers and let you know that they are nearby (or far away).
##The Project Let me just quickly interject that for our sample project, we are going to build a very simple luggage tracking app! Tracking apps and devices have become pretty popular lately, so let’s build one.
You will be able to place an iBeacon in one or more of your suitcases, and the app will tell you when your luggage is getting close to you on the turnstile. If you use your imagination a little bit, the generic tracking functionality can be used for a lot of things, and you can build your own personal Tile or Trackr knockoff for $5 apiece if you use Gimbals (I will be using an Estimote for the purposes of this article).
##Ranging vs. Monitoring In iBeacon-speak, there are two functions that we perform when interacting with the devices: Ranging and Monitoring.
Monitoring answers the simple question: “Have I entered a beacon’s space yet?” It is the operation on which most beacon-related functionality is based, because the most common scenario for an app that interacts with these devices is determining if the iOS device has entered into a beacon-space of interest.
The app we’re building for the article, however, will focus on Ranging, because it answers a different question: “How close am I to the beacon?” It should be noted that the granularity of the data is pretty imprecise and it doesn’t convey direction information. But for our needs in determining if our luggage is approaching us, they’ll work just fine. This is a fun project idea, so go out and get a beacon or three and then let’s go!
If you would like to simply just download the sample code and follow along, that’s totally fine too. You can find the sample code on GitHub.
Getting Started
In Core Location, when working with iBeacons, we use the CLLocationManager object to handle all the details of connecting and scanning for the beacons. The procedure looks basically like the following:
- Create a CLLocationManager object.
- Authorize Location Services with the
CLLocationManager’srequestAlwaysAuthorization(this only has to be done once). - Create a CLBeaconRegion with a specific UUID, and give it a name to identify the region within your app.
- Start scanning (or “ranging” in iBeacon parlance) using the CLLocationManager object’s
startRangingBeacons, providing the CLBeacon region you created in the prior step.
That’s basically it to get started.
The authorization step is a necessary evil, since the user needs to grant your app access to Location Services. When you call the CLLocationManager’s class method, the following alert view will be generated, giving the user a change to approve your app for use with Core Location:
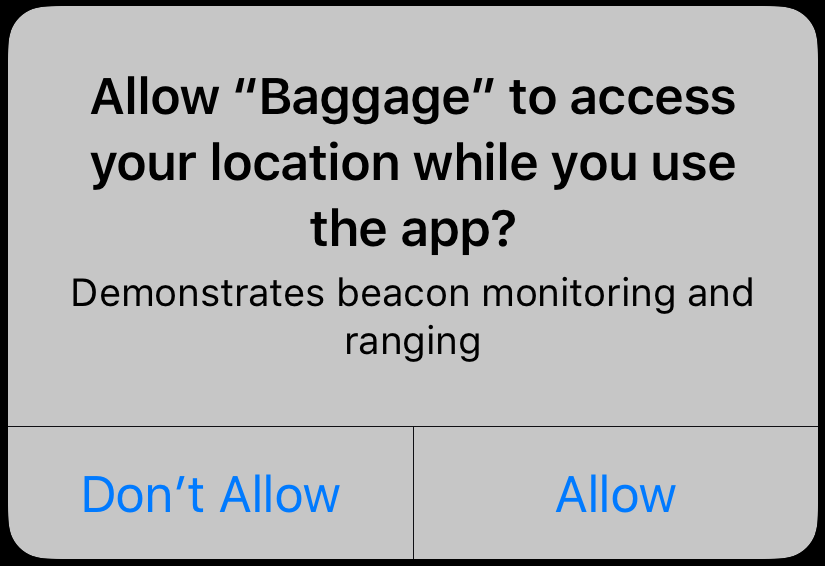
Once that’s done, however, your users will not see that dialog again unless they uninstall the app and reinstall. Please remember that there’s always a chance a your user will tap “Don’t Allow”, so it’s probably a good idea to bulletproof that part of the code in case you check the permission and it comes up something other than authorizedAlways or authorizedWhenInUse (depending on the level of access you asked for).
In the sample project for this article, we will use authorizedWhenInUse, though you may want to try using the authorizedAlways if you want your app to work in the background.
###More Delegates Similar to how there were quite a few delegate methods that we had to implement when working with Core Bluetooth, delegates are used in Core Location as well to handle events with the iBeacons.
Unsurprisingly, the delegate protocol we will implement is CLLocationManagerDelegate, using the following two delegate methods:
locationManager(_ manager: CLLocationManager, didChangeAuthorization status: CLAuthorizationStatus)
locationManager(_ manager: CLLocationManager, didRangeBeacons beacons: [CLBeacon], in region: CLBeaconRegion)
The first one lets us know when the authorization status for the application changed, and it is called when the app’s ability to use location services changes - for example by the user allowing or denying the use of location services at the application or the OS level in the iOS Settings app.
##Beacon Manager For this app, I have created a class called BeaconManager that is used by the BaggageViewController. I like creating this kind of class because it can now be lifted out an dropped into another project relatively easily, instead of intertwining all the beacon-specific code in the view controller, which, frankly, is an anti-pattern and should be avoided.
###Creating the CLLocationManager
The first thing the BeaconManager class does is create our CLLocationManager instance and set up the beacon region in the initializeLocationManager method, which is called from BaggageViewController.viewDidAppear:
func initializeLocationManager() {
  // 1
  locationManager = CLLocationManager()
  // 2
  locationManager.delegate = self
  // 3
  beaconRegion = CLBeaconRegion(proximityUUID:UUID(uuidString: beaconUUID)!, identifier: beaconRegionIdentifier)
  isRanging = false
}
Just to give a rundown of what’s happening in this method, we first create the CLLocationManager (1), then we set the delegate property to self (2). We have to set this property so we can respond to Location Service events tracked by CLLocationManager.
Note: I can’t tell you how many times I make the mistake of forgetting to wire up the delegate property. It manifests itself in an “everything should be working but it’s not” kind of behavior, so remember to always set your delegates!
Next we create a Beacon Region (3) by instantiating a CLBeaconRegion object with a UUID object (formerly known as an NSUUID in Objective-C and Swift 2 and lower). We also give it a string as an identifier which iOS uses to keep track of the region in our behalf. I used reverse-domain notation for the region (“io.cloudcity.BeaconRegion”), but you may call it whatever you like. The format is not important, but I like to be consistent in my identifier naming conventions and reverse-domain-name notation works pretty well for this kind of thing.
A Beacon Region is defined in Apple’s developer documentation as “a type of region that is based on the device’s proximity to a Bluetooth beacon, as opposed to a geographic location.”
Therefore, instead of creating a region based on geocoded coordinates on the earth’s surface, we create a region that is based on an iBeacon’s point in space, and the region radiates from the device.
###Authorizing Location Services
The BeaconManager class then handles the authorization request for the user in the manner we outlined earlier in the authorizeLocationServices method, which is also called from BaggageViewController.viewDidAppear:
func authorizeLocationServices() {
  let status = CLLocationManager.authorizationStatus()
  if (status != CLAuthorizationStatus.authorizedWhenInUse) {
      locationManager.requestWhenInUseAuthorization()
  } else {
      delegate?.beaconManager(self, locationServicesAuthorized: true, status:status)
  }
}
All this method does is check to see if we’re currently authorized with the authorizedWhenInUse status, and if not, calls requestWhenInUseAuthorization to request access to Location Services.
##Starting Ranging
To start scanning for and detecting iBeacons, all we need to do is call the startRangingBeacons method of the CLLocationManager object:
locationManager.startRangingBeacons(in: self.beaconRegion)So you can see how easy it is to start the ranging process… it’s really just one method call to kick that off.
The next thing that happens is that the CLLocationManager begins to find beacons with the matching UUID.
##Detecting iBeacons
Once the CLLocationManager begins detecting iBeacons, it will call the locationManager(_: CLLocationManager, didRangeBeacons: [CLBeacon], in region: CLBeaconRegion) delegate method, and that is the method in which we process what the Location Manager has found:
func locationManager(_ manager: CLLocationManager, didRangeBeacons beacons: [CLBeacon], in region: CLBeaconRegion) {
  // 4
  delegate?.beaconManager(self, didFindBeacons: beacons, inRegion: region)
  // 1
  let knownBeacons = beacons.filter { $0.proximity != CLProximity.unknown }
  // 2
  if (knownBeacons.count > 0) {
    let closestBeacon = knownBeacons[0] as CLBeacon
    // 3
    delegate?.beaconManager(self, didFindClosestBeacon: closestBeacon)
  }
}
The first thing we do is filter out any beacons that have the proximity property with a value of CLProximity.unknown (1). A value of CLProximity.unknown indicates that the Location Manager could not figure out the proximity of the beacon, so we ignore those because it’s just not very useful at this point. Because we used the filter method of the array, we get an array back, and once we have that array, we can determine if the array has any elements and if so, grab the first one (2), because the array will be ordered with the closest beacon first, in element zero.
Once we have the closest beacon, we can notify the BeaconManager’s delegate that we found the closest one.
Please note that we also return all beacons that were detected at the top of the method (4), so that array of beacons could be used to map out multiple beacons if you wanted to (and map them to the major and minor values). We send the array of all beacons to the delegate via the beaconManager(_:BeaconManager, didFindBeacons: Array<CLBeacon>, inRegion:CLBeaconRegion) to optionally processing in the delegate (if that’s what you wish to do with your app). However, for the sake of our simple demo, we just assume there’s one beacon, but it wouldn’t be difficult to modify this for multiple beacons.
##Proximity
One really important thing to remember: the value detected for the range of the iBeacon will be pretty imprecise. That’s OK, because we really only want a general idea of how close the device is. In the main, you get three values for the proximity: Far, Near, and Immediate, represented by CLProximity.far, CLProximity.near, and CLProximity.immediate respectively. There’s also that CLProximity.unknown value, which again just means that Location Services can’t figure out exactly where it is, though it is being detected somewhere.
In our demo app we use the proximity property to render the suitcase, depending on how close it is to us:
![]()
In the above screenshot, we’re rendering it close to us because it’s in the “Immediate” proximity to the iOS device running the app.
##Stopping Ranging
If you wish to stop ranging, it’s just as simple as starting ranging:
locationManager.stopRangingBeacons(in: beaconRegion)All you need to do to stop ranging is call the stopRangingBeacons method of the CLLocationManager object. You need to pass the particular region that you are ranging, because you can have multiple regions ranging at the same time. In our case, we only have one region, so we just pass the one we have a reference to.
##Conclusion As you can see, working with iBeacons is not that bad once you get your feet wet.
I hope this tutorial takes away some of the mystery for developers who are interested in trying out this new and exciting field of IoT, and I hope you come up with some really interesting uses for the technology! Please let me know what you come up with!
###References Want to learn more? Here are some references that I’ve found helpful:
Apple Developer - Location and Maps Programming Guide - Region Monitoring and iBeacon
Estimote Blog - What are region Monitoring and Ranging?
##What’s Next? If you have a project that you’re trying to get off the ground, whether it involves the Internet of Things (IoT), iBeacons, or BLE. Or you have a mobile app you need help launching, or perhaps, the backend for your web or mobile app needs to be developed, please contact Cloud City Development today to see how we can help you!
You’ll be in good hands and we love working with nice people who have great ideas!